


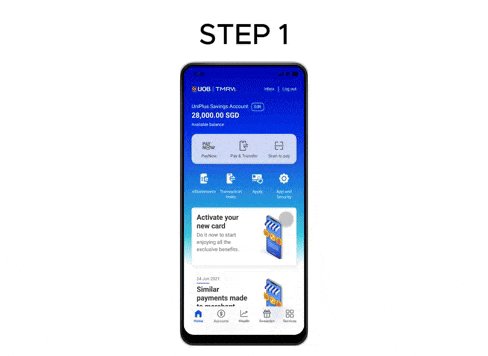
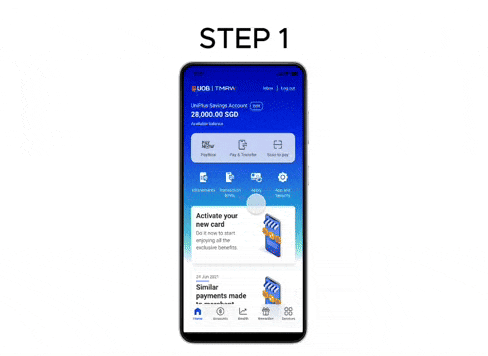
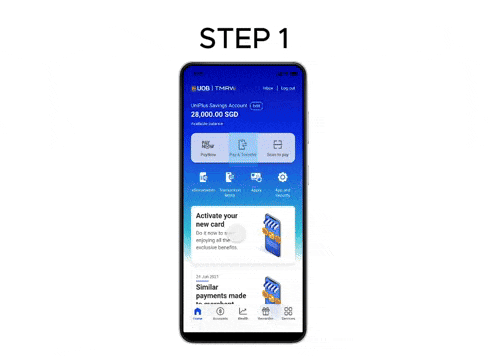
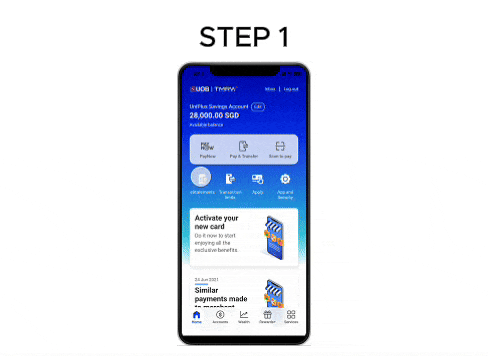
Step-by-step guides
Getting started
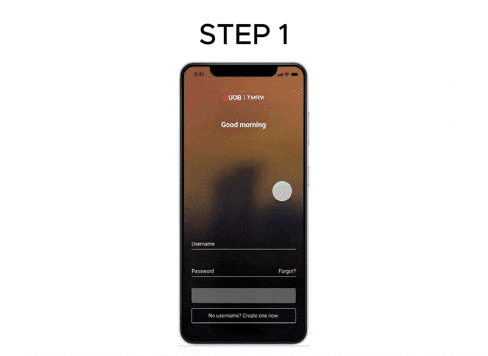
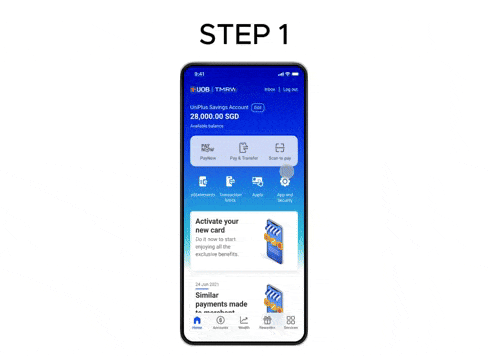
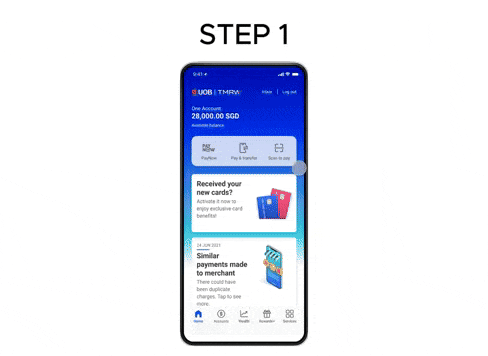
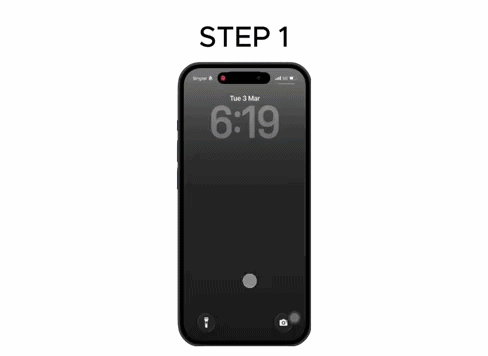
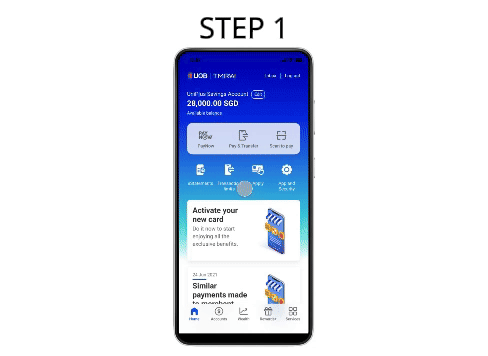
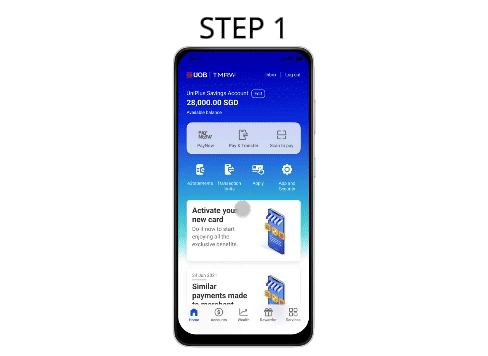
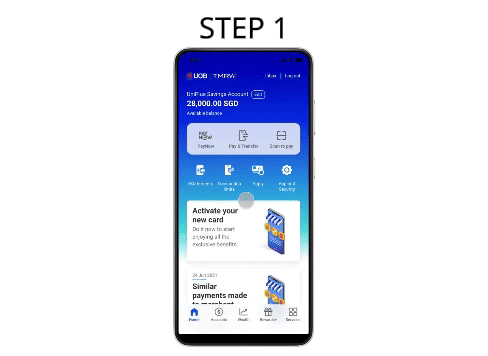
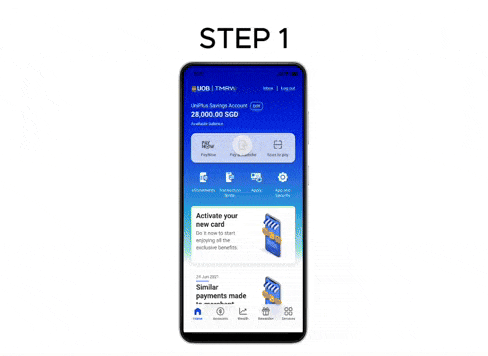
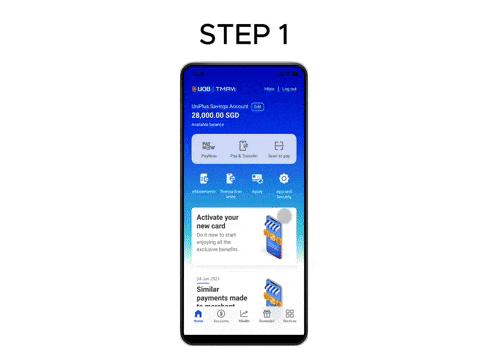
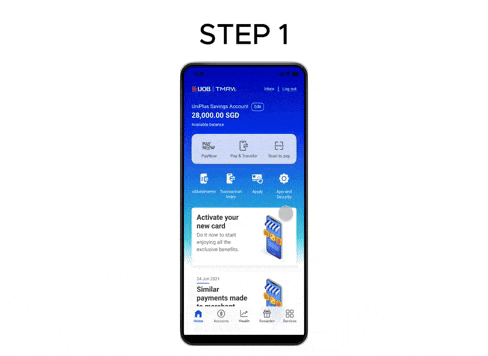
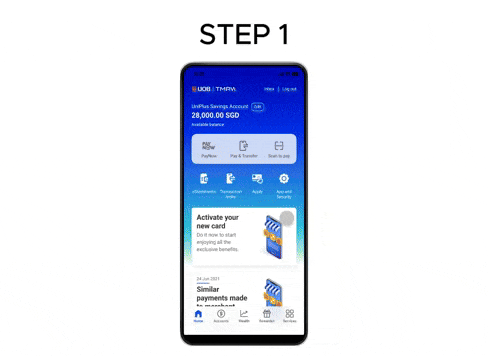
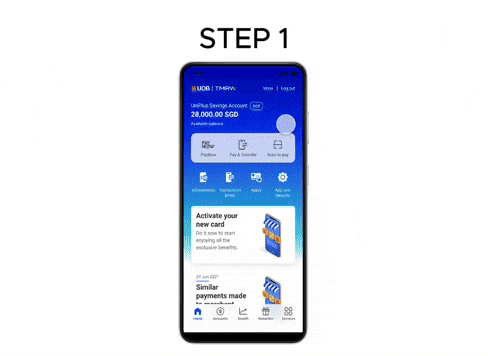
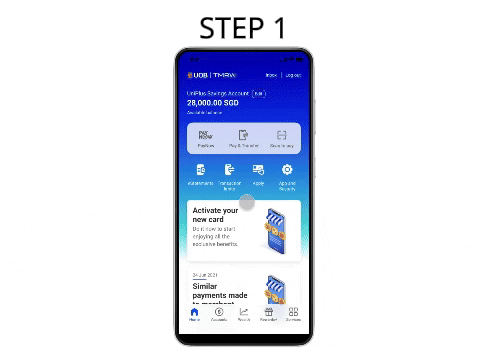
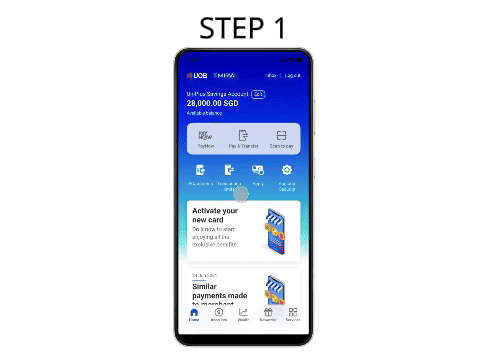
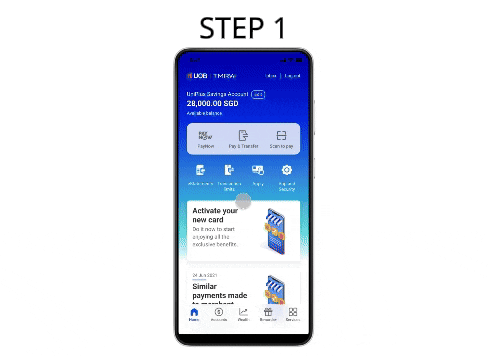
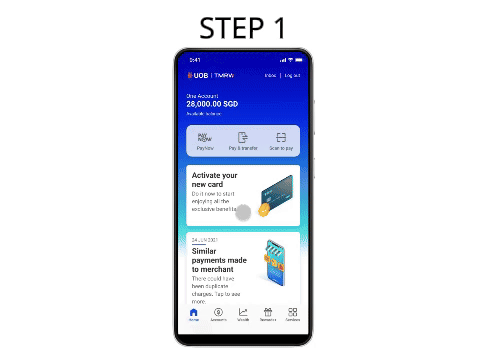
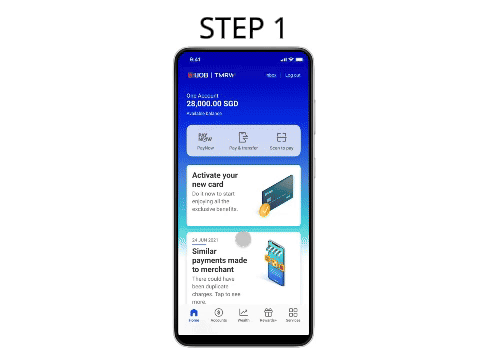
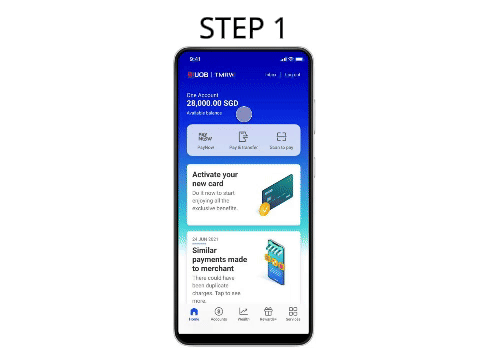
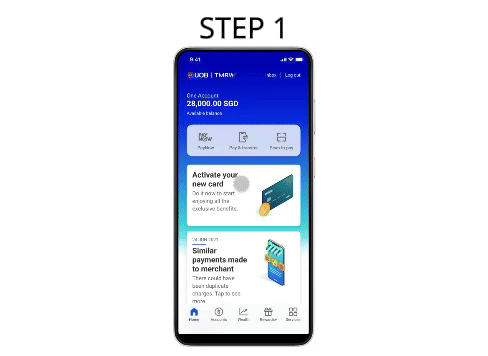
Step 1 : Tap on ‘No username. Create one now’ to register for a digital banking account. Tap ‘Forgot?’ to reset your password.
Step 2 : Enter the required information, click Next. Confirm mobile number and enter SMS OTP to verify.
Step 3 : Enter the card details that are mailed to you.
Step 4A : For new customers: Create username and password.
Step 4B : For existing customers: Retrieve username and reset password.
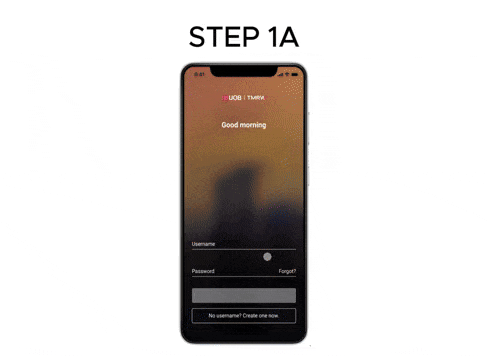
Step 1A : Tap on "Set it up now".
Step 1B : Key in the SMS-OTP sent to your mobile number.
Step 2A : Set up Fingerprint for faster log-in.
Step 2B : Enable Face ID login.
Step 3 : Set up your digital token.
Step 4 : Your digital token is all set up. Next, enable your notifications.
Step 5 : Start using UOB TMRW now.
Step 1 : Tap on "digital token“ on the UOB TMRW login screen.
Step 2 : When prompted on login, tap ‘Set up now’.
Step 3 : Select how you want to verify your identity via these 2 options and follow the on-screen instructions.
1.Email and SMS OTP.
2.Card and ATM PIN.
Step 4 : Tap ‘Create digital token code’ to create your personalized 6-digit PIN.
Step 5 : Enter your desired 6-digit code, then enter it again for confirmation.
Step 6 : You will receive an SMS notification, informing of your successful digital token setup. For an added layer of security, you will only be able to activate your token after 12 hours.
Step 1 : Login to UOB TMRW and tap “Services”.
Step 2 : Select “Notification settings” under “Profile”.
Step 3 : Select the transaction category that you wish to manage your alerts.
Step 4 : The category will be expanded to show the list of transactions. Select the relevant transaction type.
Step 5 : Select your preferred notification mode and threshold amount for alerts and then tap Save. If you do not wish to make any changes, the default notification mode and threshold amount set by the bank will apply.
Step 6 : Review and confirm the details by swiping to the right.
Step 7 : As an added layer of security, you will be required to enter your digital token code to proceed.
Step 8 : Your notification settings have been updated.
Card Services
Step 1 : Log in to UOB TMRW and tap "Accounts".
Step 2 : Select the debit or credit card you wish to replace.
Step 3 : Tap on "Replace damaged card" to proceed.
Step 4 : Check your mailing address details and tap "Next" to continue.
Step 5 : Review details and swipe right to confirm. Replacement fees will be waived for the first replacement request within the same year.
Step 6 : Your card replacement request is successful.
Step 1 : Log in to UOB TMRW and tap "Accounts".
Step 2 : Select the debit or credit card you wish to block and report.
Step 3 : Tap on “Report fraud”.
Step 4 : Tap "Next" to continue.
Step 5 : Review details and swipe right to confirm.
Step 6 : Tap "Call us now" to contact our dedicated 24/7 Fraud Hotline at 6255 0160 and press “1” to report a case.You will need to provide the following details:
- Date and time of the fraud
- Describe how the fraud occurred
- The fraudulent transactions on your cards (if any)
Alternatively, tap "Back to Home" to go to dashboard.
Step 1 : Log in to UOB TMRW and tap "Accounts".
Step 2 : Select the debit or credit card that you intend to report and replace.
Step 3 : Tap on “Report lost card”.
Step 4 : Review your mailing address details. Replacement fees will be waived for the first replacement request within the same year. If this is not your first replacement request, a replacement fee of S$20 will be charged.
Step 5 : Review details and swipe right to confirm.
Step 6 : Your request is completed. Your lost card has been permanently deactivated and removed from your digital wallets. Your replacement card will be sent to you soon.
Step 7 : Your replacement card will be sent to you soon. Remember to activate it once you have received your new card.
Step 1 : Log in to UOB TMRW and tap "Accounts".
Step 2 : Select the affected debit or credit card you wish to block and report.
Step 3 : Go to “Services” tab, and tap on the “Lock card” icon.
Step 4 : There will be a prompt shown to confirm the request. Tap “Lock now” to proceed.
Step 5 : Review details and swipe right to confirm.
Step 6 : Your card has been locked! If you wish to unlock your card, you could tap on the “Lock card” icon on your card summary screen to unlock.
Step 7 : Tap on “Unblock card”.
Step 8 : Tap on “Next”.
Step 9 : Review details and swipe right to confirm.
Step 10 : Your card has been unblocked!

Step 1 : Log in to UOB TMRW and tap "Accounts".
Step 2 : Select the affected debit or credit card you wish to replace.
Step 3 : You will be prompted with a message that your "Card is locked". To replace this card, tap on "Replace card".
Step 4 : Check your mailing address details and tap "Next" to continue.
Step 5 : Review details and swipe right to confirm.
Step 6 : Your request is completed. You will receive your replacement card soon.
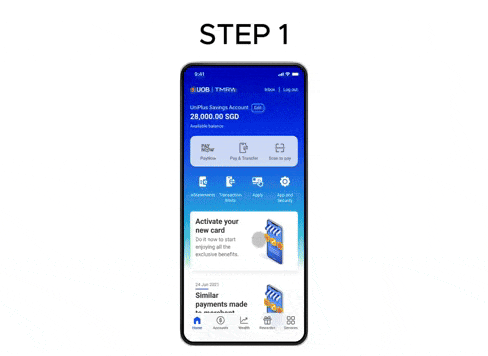
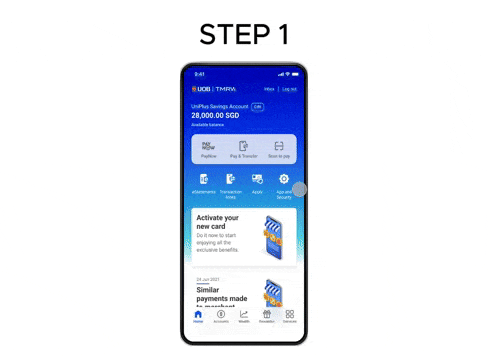
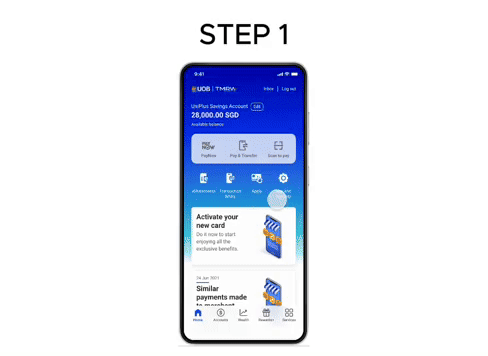
Step 1 : Log in to UOB TMRW and tap on “Received your new cards?”.
Step 2 : Next, select the cards that you wish to activate.
Step 3 : Tap on "Yes" to proceed with the activation. If you are activating a replacement card, your current card will be deactivated.
Step 4 : Tap on "OK" to proceed. You can start using your new card.
Step 1 : Log in to UOB TMRW and tap "Accounts".
Step 2 : Next, tap on your credit card that you wish to cancel.
Step 3 : Tap on "Cancel Card" to proceed.
Step 4 : Tap on "Reason for cancellation" to select the reason from the dropdown list.
Step 5 : Tap on "Next" to proceed.
Step 6 : Review the details and swipe right to confirm.
Step 7 : Your card cancellation request is completed.
Step 8 : You will not be able to use your card after you have submitted your cancellation request. Do remember to pay any outstanding bills.

Step 1 : Log in to UOB TMRW and tap "Accounts".
Step 2 : Next, tap on your credit or debit card that you wish to reset your PIN.
Step 3 : Tap on "Reset card PIN" to proceed.
Step 4 : Enter the new 6-digit PIN and confirm the new PIN.
Step 5 : You can choose to hide or show the PIN entered. Next click "Submit" to continue.
Step 6 : Enter the digital token code for authentication.
Step 7 : Your request is completed and you can start to use your new PIN.

Step 1 : Log in to UOB TMRW and tap "Accounts".
Step 2 : Select a debit or credit card to link your current or savings accounts with.
Step 3 : Tap on "Enable ATM withdrawal".
Step 4 : Tap on "+ Primary account" to link your Current/Savings account to this Card.
Step 5 : Tap "Next" to continue.
Step 6 : Enter the digital token code for authentication.
Step 7 : You have successfully linked your primary account to your debit / credit card. You may proceed to perform ATM withdrawals and NETS transactions.
Step 1 : Log in to UOB TMRW and tap "Accounts".
Step 2 : Next, tap on your preferred debit or credit card to waive the fee(s).
Step 3 : Select "Waive fees" from the card services screen.
Step 4 : Select the fees that you wish to waive and tap on "Next" to proceed.
Step 5 : Review the details and swipe to confirm.
Step 6 : Your request is completed and will be processed by the next working day.
Step 1 : Log in to UOB TMRW and tap "Accounts".
Step 2 : Next, tap on your credit card that you wish to increase your limit.
Step 3 : Under services, tap on "Increase credit limit temporarily" to proceed.
Step 4 : Enter the additional credit limit amount.
Step 5 : Select the reasons from the dropdown list.
Step 6 : Select the duration.Note: The earliest start date will be 1 day from the request date and maximum duration is 30 days.
Step 7 : Tap "Next" to continue.
Step 8 : Review the details and swipe to confirm.
Step 9 : The request is completed.
Step 1 : Log in to UOB TMRW and tap "Accounts".
Step 2 : Select your preferred UOB Card to activate magnetic stripe.
Step 3 : Under services, tap on "Manage overseas use".
Step 4 : Enable magnetic stripe and indicate period of overseas use. Click "Save".
Step 1 : Log in to UOB TMRW, select “Accounts” tab and tap on desired card to pay instalments monthly.
Step 2 : Select to convert either the eligible balance across all cards or on the selected card.
Step 3 : Move slider to desired tenure.
Step 4 : Review the details and swipe right to confirm.
Step 5 : Your request is completed.
Step 6 : A push notification, email and SMS will be sent to inform you of your application outcome.
Step 1 : Log in to UOB TMRW, select “Accounts” tab and tap on desired card to pay instalments monthly.
Step 2 : Select to convert either selected transactions across all cards or on the selected card.
Step 3 : Select up to 5 transactions with a minimum total of S$500.
Step 4 : Move slider to desired tenure.
Step 5 : Review the details and swipe right to confirm.
Step 6 : Your request is completed.
Step 7 : A push notification, email and SMS will be sent to inform you of your application outcome.
Step 1 : Open the Wallet app. Tap the sign at the top right.
Step 2 : Use your iPhone's camera to capture the card's information. You can also enter the card details manually.
Step 3 : Check the card details and enter security code (CVV or CVC).
Step 4 : Read and accept the 'Terms & Conditions' twice.
Step 5 : Choose how to verify your card for Apple Pay.
Step 6 : Tap on the notification you have received to launch UOB TMRW.
Step 7 : Your request is completed.
Step 8 : Verification is complete. Tap Ok to proceed.
Step 9 : You can load multiple UOB cards and set a default card for payment. Simply open the Wallet app, then tap and hold the card. Drag it to the front and release. You will receive a notification confirming your default card.
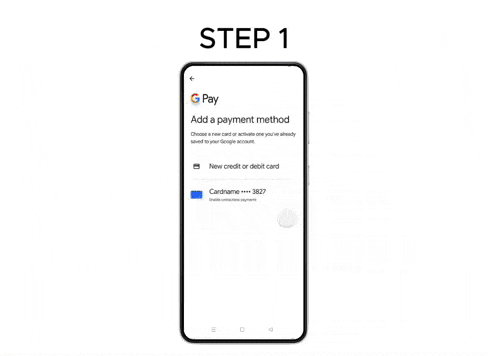
Step 1 : Open Google Pay app.
Step 2 : Take a picture of your UOB debit or credit card, or key in your card details manually.
Step 3 : Read and accept the Issuer Terms.
Step 4 : For security purposes, we will send you a verification code via SMS. Enter this received verification code.
Step 5 : Tap on the notification you have received to launch UOB TMRW.
Step 6 : Enter your 6-digit digital token code.
Step 7 : Verification is complete. You can now use your UOB debit or credit card with Google Pay.
Step 1 : Log in to UOB TMRW and tap "Accounts".
Step 2 : In your UOB TMRW app, select "Contactless ATM" in the "Services" menu.
Step 3 : Tap on the card you wish to make preset withdrawals from.
Step 4 : Indicate your preference on Debiting Account, Withdrawal amount and Display of Balance. Tap on next once you are done.
Payments/ Transfer services
Step 1: Tap and hold the lock screen.
Step 2: Tap 'Customize', then tap 'Add Widgets'.
Step 3: Search 'UOB TMRW”
Step 4: Tap or drag 'Scan to pay' or 'PayNow' icon to the lock screen.
Step 5: Tap 'Done' at the top right corner. Widget added successfully.
Step 1 : On your home screen, touch and hold an empty space until the apps wiggle
Step 2 : Tap 'Edit' in the top left corner and search 'UOB TMRW'
Step 3 : Tap 'Add widget'.
Step 4 : Widget has been successfully added. Simply tap on UOB TMRW widget for instant access to PayNow/Scan to pay.
Step 1 : On your home screen, touch and hold an empty space.
Step 2 : Tap 'Widgets' and search 'UOB TMRW
Step 3 : Drag and drop the widget onto your home screen. Widget has been successfully added. Simply tap on UOB TMRW widget for instant access to PayNow/Scan to pay.
Step 1 : Login to UOB TMRW and tap “Transaction limits".
Step 2 : Select the limit you wish to change.
Step 3 : Your current and new limit will be shown here.
Step 4 : Review your new limit and swipe right to confirm. As a fraud control measure, there is a 12h cooling period before your limit increase takes effect. This does not apply for limit reductions.
Step 5 : Next, enter your digital token code as an added layer of security. This step is not required for limit reductions.
Step 6 : Your change of transaction limit is successful.
Step 1 : Login to UOB TMRW and tap “Pay & Transfer".
Step 2 : Tap on "Add Payee or Biller" at the bottom of the screen.
Step 3 : Select the funds transfer proxy type from the dropdown list.
Step 4 : Review your recipient details by swiping to the right.
Step 5 : As an added layer of security, you will be required to enter your digital token code to proceed.
Step 6 : You will receive an SMS notification, confirming of your newly added payee. As a fraud control measure, there is a 12h cooling period before your new payee is added. This does not apply for payee removals.
Step 1 : Login to UOB TMRW and tap “Pay & Transfer".
Step 2 : Tap on “My Accounts/ Cards“ if it is a transfer to your own account. Alternatively, you can tap on "Other Accounts/ Cards“ for transfer to other accounts.
Step 3 : Select the bank account to transfer to.
Step 4 : The debiting account will be pre-selected from your last transaction. Enter the amount and date of transfer. Tap "Next" to proceed.
Step 5 : In the confirmation screen, review the details and swipe right to confirm.
Step 6 : You have successfully performed a funds transfer.
Step 1 : Log in to UOB TMRW and tap on "Pay & Transfer".
Step 2 : Tap on the Account you wish to pay or transfer the fund to.
Step 3 : Input the amount you are transferring to. Next, tap on the calendar icon to select the date for the first fund transfer to be initiated.
Step 4 : To setup a recurring fund transfer, you will need to select a future dated date. If you select "Today" as the date of transfer, it will be treated as a one off immediate fund transfer.
Step 5 : Select the frequency of the recurring fund transfer (e.g. Once, Daily, Weekly, Monthly, Quarterly).
Step 6 : Select the number of times you wish for the recurring fund transfer to take place You can select from 1 to 24, or "Indefinite" if there is no end date for this recurring fund transfer.
Step 7 : You will be prompted to confirm that the transfer is to be sent to a payee that you know and trust. Tap on "Continue" to proceed.
Step 8 : In the confirmation screen, check all details and swipe right to confirm.
Step 9 : The recurring fund transfer setup is completed.
Step 1 : Login to UOB TMRW and tap on “Services“ tab.
Step 2 : Under 'Transactions', select "Scheduled transfers".
Step 3 : Select the scheduled transfer you wish to update, and swipe right to choose Edit or Delete.
Step 4 : If you have selected “Delete”, confirm the details by swiping right.
Step 5 : You have successfully deleted your scheduled transfer transaction.

Step 1 : Log in to UOB TMRW and select "Scan to pay".
Step 2 : Scan the QR code or upload it from your device.
Step 3 : The merchant details will be populated. Fill in the transaction amount in the local currency. An indicative exchange rate will be displayed. Click “Next” to proceed.
Step 4 : Review and confirm the payment details.
Step 5 : Click ‘Share’ to generate an image that shows the successful payment without your account details. It can be saved or shared with the merchant.
Step 1 : Log in to UOB TMRW and tap "PayNow".
Step 2 : Tap on "Setup".
Step 3 : Input registration details. The PayNow name you have set will be shown to your sender. If you are the sender, your full name will be shown to the recipient.
Step 4 : Select the Bank account you wish to link to your mobile number and/or NRIC/FIN.
Step 5 : Review the details and swipe right to confirm.
Step 6 : Next, enter your SMS OTP.
Step 7 : You have successfully registered for PayNow. You may now receive money in real-time securely and instantly via PayNow.
Step 1 : Log in to UOB TMRW and select "Scan to pay".
Step 2 : Tap on "My QR" and enter the amount you are requesting.
Step 3 : Share your generated QR code with your friends to receive payment.
Step 1 : Login to UOB TMRW and tap "Scan to pay".
Step 2 : Select QR code or upload from device.
Step 3 : Select Payment mode.
Step 4 : Enter purchase amount.
Step 5 : Select account.
Step 6 : In the confirmation screen, check all details and swipe right to confirm.
Step 7 : Successful transaction.
Step 1 : Login to UOB TMRW and tap “Pay & Transfer".
Step 2 : Tap "PromptPay mobile no. (Thailand)".
Step 3 : Enter recipient's Thailand mobile number with country code (+66) or select their name from your address book. Tap "Next".
Step 4 : Enter the amount in THB. You can transfer between THB 100 and the equivalent of S$1000 per day. Tap "Next".
Step 5 : You will be prompted to confirm that the transfer is sent to a payee that you know and trust. Tap on "Continue" to proceed.
Step 6 : Review the details and swipe right to confirm. The above service fees is for illustration purpose and is currently waived. If the rate has expired, simply tap on "Refresh" to get a new exchange rate.
Step 7 : Transfer complete! Tap on "Share" to send an image of the transaction via your preferred social messaging app.
Step 1 : Login to UOB TMRW and tap “Pay & Transfer".
Step 2 : Tap on "Add payee or Biller" at the bottom of the screen.
Step 3 : Tap on "Biller" and type biller name or select from the dropdown list.
Step 4 : Enter the details and tap on "Next".
Step 5 : You will be prompted to confirm that the biller and bill reference no. are correct. Tap on "Proceed".
Step 6 : Confirm the details by swiping right.
Step 7 : You have successfully added your biller.
Step 1 : Login to UOB TMRW and tap “Pay & Transfer".
Step 2 : Select "Billers".
Step 3 : Select your billing organisation. If you wish to save this biller, refer to How to add biller.
Step 4 : The debiting account will be pre-selected from your last transaction. Enter amount and payment date.
Step 5 : You will be prompted to confirm that the transfer is sent to a payee that you know and trust. Tap on "Continue" to proceed.
Step 6 : Confirm the details by swiping right.
Step 7 : Your bill payment is successful.

Step 1 : Log in to UOB TMRW and select "PayNow".
Step 2 : Tap on "VPA" and enter your Virtual Payment Address e.g. +6591234567#GRAB.
Step 3 : Select the debiting account.
Step 4 : Confirm your recipient details by swiping to the right.
Step 5 : Transfer completed! Tap on "Share" to send an image of the transaction via your preferred social messaging app.
Step 1 : Log in to UOB TMRW and select "Pay & Transfer".
Step 2 : Tap on "Other Accounts / Cards".
Step 3 : Tap on "New Transfer".
Step 4 : Go to "Type" field and select "Bank Account/other institution" from the dropdown list.
Step 5 : Select "Bank Accounts/other institution".
Step 6 : Select the "Bank Accounts/other Institution" from the dropdown list. Enter the account number to transfer to and tap “Next”.
Step 7 : Enter the amount. Tap "Next" to proceed".
Step 8 : You will be prompted to confirm that the transfer is sent to a payee that you know and trust. Tap on "Continue" to proceed.
Step 9 : In the confirmation screen, review the details and swipe right to confirm.
Step 10 : Transfer completed! Tap on “Share" to send an image of the transaction via your preferred social messaging app.
Step 1 : Log in to UOB TMRW and select "Pay/Transfer".
Step 2 : Tap on "My UOB Accounts/Cards".
Step 3 : Select the bank account to transfer to.
Step 4 : Enter the amount and date of transfer. Tap "Next" to proceed.
Step 5 : Click "Yes" to acknowledge and proceed with the Cash Advance transaction.
Step 6 : In the confirmation screen, review the details and swipe right to confirm.
Step 7 : You have successfully performed a Cash Advance funds transfer.
Step 1 : Log in to UOB TMRW and tap “Pay & transfer".
Step 2 : Tap on “Electronic Deferred Payment (EDP)”.
Step 3 : Tap on “Issue new EDP”.
Step 4 : Enter the details, select either EDP or EDP+ and tap on “Next”.
Step 5 : Review the details and swipe right to confirm.

Step 1 : Log in to UOB TMRW, tap “Services“ and “Manage EDP”.
Step 2 : Tap on “Issued” and select EDP to cancel.
Step 3 : Review EDP details and tap “Cancel payment”.
Step 4 : Enter the reason for cancellation and tap “Next”
Step 5 : Review and confirm details, then swipe right to confirm.
Step 6 : EDP is cancelled. Tap “Share” to send details if needed.

Step 1 : Log in to UOB TMRW, tap “Services“ and “Manage EDP”.
Step 2 : Tap on “Received” and select EDP to collect payment on.
Step 3 : Review EDP details and tap “Collect payment”.
Step 4 : Review and confirm details, then swipe right to confirm.
Step 5 : Your request to collect payment is submitted!

Step 1 : Log in to UOB TMRW, tap “Services“ and “Manage EDP”.
Step 2 : Tap on “Received” and select EDP to reject.
Step 3 : Review EDP details and tap “Reject payment”.
Step 4 : Enter the reason for rejection and tap “Next”
Step 5 : Review and confirm details, then swipe right to confirm.
Step 6 : Your request to reject payment is submitted!
Banking services
Step 1 : Log in to UOB TMRW and tap "eStatements". Alternatively, you could tap on "Services" and select "eStatements" under Transactions.
Step 2 : Tap "Manage" found on the top right corner of the screen.
Step 3 : Tap "Switch Now".
Step 4 : Select the accounts, investments or cards that you wish to switch to electronic statement.
Step 5 : Tap "Save".
Step 6 : You have successfully enrolled for your eStatement.
Step 1 : Log in to UOB TMRW and tap “Apply”.
Step 2 : Choose the deposit account that you wish to apply for.
Step 3 : Tap “Apply” and follow the on-screen instructions.
Step 1 : Log in to UOB TMRW and tap "Apply".
Step 2 : Choose the card that you wish to apply for.
Step 3 : Tap “Apply” and follow the on-screen instructions.
Step 1 : Login to UOB TMRW and tap “Services”. Alternatively, you may also access “Branch Q” by tapping on “More” on the UOB TMRW login screen.
Step 2 : Select “Branch Q” under “Branch Services”.
Step 3 : Search by branch name.
Step 4 : Select Service type.
Step 5 : Select Personal or SME.
Step 6 : Key in your mobile number to get notified via SMS when your turn is near.
Step 7 : Your queue number will be sent to you via SMS.
Step 8 : You will receive a notification SMS informing of your queue number.
Step 1 : Login to UOB TMRW and tap on “Services“ tab.
Step 2 : Under 'Profile', select "Contact Details".
Step 3 : Select "Email address"
Step 4 : Enter your new email address and tap "Next" to proceed.
Step 5 : A warning message is prompted to confirm that the contact details are correctly updated to receive important banking alerts. Tap “Proceed”.
Step 6: Review the details and swipe right to Confirm.
Step 7A : As an added layer of security, a 6-digit-code will be sent to your new email address.
Step 7B : You will be required to enter the 6-digit-code to proceed.
Step 8: Next, please enter your digital token code.
Step 9: You have successfully updated your email address.
Note: The above guide is for UOB TMRW app version 18.16.4 and above.
Step 1 : Login to UOB TMRW and tap on “Services“ tab.
Step 2 : Under Profile, select "Contact Details".
Step 3 : Select "Mobile number".
Step 4 : Enter your new mobile number and tap "Next" to proceed.
Step 5 : A warning message is prompted to confirm that the contact details are correctly updated to receive important banking alerts. Tap “Proceed”.
Step 6: Review the details and swipe right to Confirm.
Step 7A : As an added layer of security, a 6-digit-code will be sent to your new mobile number.
Step 7B : You will be required to enter the 6-digit-code to proceed.
Step 8: Next, please enter your digital token code.
Step 9: You have successfully updated your mobile number.
Note: The above guide is for UOB TMRW app version 18.16.4 and above.
Step 1 : Login to UOB TMRW and tap on “Services“ tab.
Step 2 : Under Profile, select “Address details”.
Step 3 : Menu will be displayed with 2 options: Update residential and mailing address OR Update mailing address only. To update residential address, select “Update residential and mailing address”.
Step 4 : This will display your current residential address (if any). Continue by tapping on ‘Update address with Myinfo’.
Step 5 : Your registered address with Myinfo will then be retrieved and displayed By default, the checkbox to update the same address as Mailing address will be checked. If you do not wish to update your mailing address, please uncheck the box. Tap on "Next" to proceed.
Step 6 : Review the details and swipe right to confirm.
Step 7 : As an added layer of security, you will be required to enter your digital token code to proceed.
Step 8 : You have successfully updated your addres.
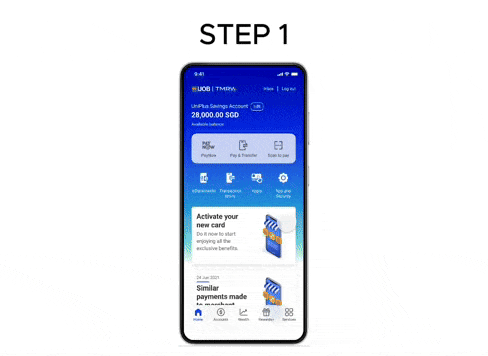
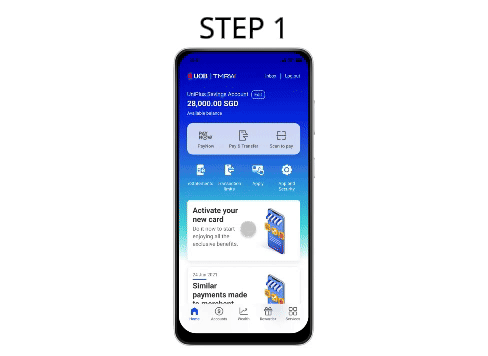
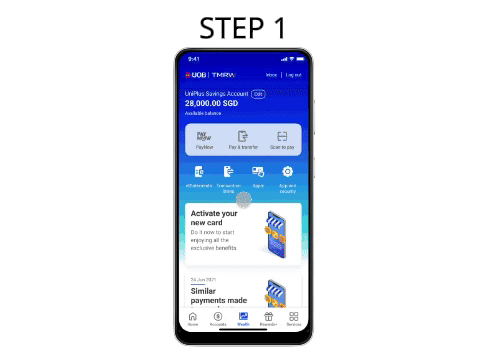
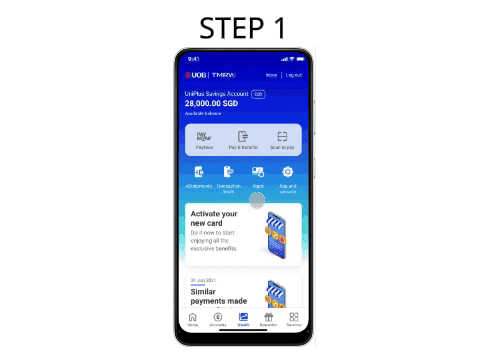
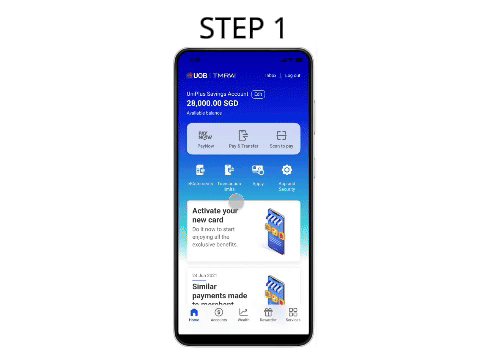
Step 1 : Log in to UOB TMRW and tap on “Accounts” tab.
Step 2 : Scroll to view the account balance(s).
Step 3 : If you wish to view your One Account bonus interest, tap on “Details” tab to see your interest tracker.
Step 4 : If you wish to access your monthly eStatements, tap on “View” on the top right corner.
Step 5 : Tap on the account that you would like to view e.g. "combined accounts".
Wealth
Step 1 : Login to UOB TMRW app, access the ‘Wealth’ tab. Tap on ‘Start investing simply’ , then tap on ‘Created for you’.
Step 2 : Select a solution that is appropriate for you.
Step 3 : Complete a short knowledge assessment.
Step 4 : Decide how much to invest for one time order and/or recurring order and set your dividend instructions (for Stable Income & Income solution only).
Step 5 : Confirm the details. You’re all set!
Step 1 : Login to UOB TMRW app, access the ‘Wealth’ tab. Tap on ‘Start investing simply’ , then tap on ‘Choose your own’.
Step 2 : Browse the curated list and select a fund you would like to invest.
Step 3 : Complete a short knowledge assessment.
Step 4 : Decide how much to invest for one time order and/or recurring order and set your dividend instructions (for Stable Income & Income solution only).
Step 5 : Select the UOB account you wish to debit investment funds from.
Step 6 : Confirm the details. You’re all set!
Step 1 : Log in to UOB TMRW app, access the ‘Wealth’ tab and tap on "SimpleInsure" to purchase PRUCancer 360.
Step 2 : Select the amount of coverage you need.
Step 3 : Your personal details will be auto-filled on the form.
Step 4 : Select the account to deduct your premium from.
Step 5 : Check and confirm your details.
Step 1 : Login to UOB TMRW app, access the 'Wealth' tab. Tap on ‘Buy Gold/Silver’ under ‘Other wealth services’.
Step 2 : Select debiting account and input number of grams/ounces to buy.
Step 3 : On your confirmation screen, verify details and swipe right to confirm transaction.
Step 1 : Login to UOB TMRW app, access the 'Wealth' tab. Tap on ‘Sell Gold/Silver’ under ‘Other wealth services’.
Step 2 : Select crediting account and input number of grams/ounces to sell.
Step 3 : On your confirmation screen, verify details and swipe right to confirm transaction.
Step 1 : Open UOB TMRW app and tap on More.
Step 2 : Tap on Fixed deposit.
Step 3 : Tap on Fixed Deposit. You will be redirected to the application form.
Step 4 : Click Next.
Step 5 : Click "Apply with Myinfo" to proceed and provide consent to retrieve your information using Myinfo. Continue through with the steps to complete the application.
Step 6 : Once you have reviewed and confirmed your application. An email notification will be sent to customer's email provided in the application to acknowledge the application submission.
Step 1 : Log in to UOB TMRW and tap "Accounts".
Step 2 : Swipe up, or to the left to access your Time/Fixed Deposit account under "Investments".
Step 3 : Tap on Time/Fixed Deposit.
Step 4 : You will be able to see your current holdings. Tap on "Advices” for more information on fixed deposit placed. To make a placement, you may tap on "Place fixed deposit".
Step 1 : Log in to UOB TMRW and tap on "Wealth".
Step 2 : Select "Place fixed deposit" under the "Other wealth services".
Step 3 : Select your fixed deposit account under "To" and a debiting account under "From". For foreign currency fixed deposit placements, select your preferred currency under "Currency" and indicate your placement amount. Tap "Next" to continue.
Step 4 : Tap on "Tenor" and select your preferred from the dropdown menu, then "Next" to continue.
Step 5 : Select your preferred "Maturity Instructions" and tap "Next" to continue.
Step 6 : Review and confirm your fixed deposit placement details by swiping right.
Step 7 : Your Fixed Deposit placement is now successful.

Step 1 : Login to UOB TMRW app, access the ‘Wealth’ tab. Select ‘Securities (IPO/Bonds)’ under ‘Other wealth services’.
Step 2 : Tap ‘Accept’ to provide your Investment Risk consent and tap ‘ Apply’ to proceed.
Step 3 : Tap ‘Agree’ to agree on risk warning. Your name, NRIC/Passport no. and CDP Securities Account no will be pre-populated. Please select Country of residence and Residency status from dropdown list and tap ‘Next’.
Step 4 : Enter ‘Unit cost’ and tap ‘Next’. Select your mode of payment and Tap ‘Next’.
Step 5 : In the confirmation screen, review the details and swipe right to confirm.
Step 1 : Login to UOB TMRW app, access the ‘Wealth’ tab. Select ‘Securities (IPO/Bonds)’ under ‘Other wealth services’.
Step 2 : Tap ‘Accept’ to provide your Investment Risk consent. Tap ‘Check applications’ and tap ‘Withdraw’ to proceed.
Step 3 : In the confirmation screen, review the details and swipe right to confirm.

Step 1 : Login to UOB TMRW app, access the ‘Wealth’ tab. Select ‘SG Savings Bonds’ under ‘Other wealth services’.
Step 2 : Tap ‘Apply’ to proceed. Select Residency status from dropdown list and tap ‘Next’ to proceed.
Step 3 : Enter ‘Investment Amount’ followed by Debiting Account and tap “Next” to proceed.
Step 4 : In the confirmation screen, review the details and swipe right to confirm.
Step 1 : Login to UOB TMRW app, access the ‘Wealth’ tab. Select ‘SG Savings Bonds’ under ‘Other wealth services’.
Step 2 : Select ‘View current applications’ tab at the top and it will show your current SSB applications.
Step 1 : Login to UOB TMRW app, access the ‘Wealth’ tab. Select ‘SG Savings Bonds’ under ‘Other wealth services’.
Step 2 : Select ‘Redeem’ tab at the top and select Month / Year that the SSB was issued.
Step 3 : Tap ‘Redeem’ on the bond with CASH payment mode. Input the Redemption amount and select the debiting account , then tap ‘Next’ to proceed.
Step 4 : In the confirmation screen, review the details and swipe right to confirm.
Step 1 : Login to UOB TMRW app, access the ‘Wealth’ tab. Select ‘SG Savings Bonds’ under ‘Other wealth services’.
Step 2 : Select ‘Redeem’ tab at the top and select Month / Year that the SSB was issued.
Step 3 : Tap ‘Redeem’ on the bond with SRS payment mode.Select Partial or Full redemption and tap ‘Next’.(Please input the redemption amount for partial redemption) SRS account will be the default debiting account.
Step 4 : In the confirmation screen, review the details and swipe right to confirm.

Step 1 : Login to UOB TMRW app, access the Wealth tab. Tap on ‘SGFinDex One View’ under ‘Other wealth services’.
Step 2 : Select "SGFinDex One View" from the list of services.
Step 3 : Login with your Singpass.
Step 4 : At this screen, tap on "Connect Financial institution" to begin linking your accounts, followed by tapping on any of the participating organisations to be linked.
Step 5 : You will be directed to retrieve your data after the linking is completed.
Step 1 : Login to UOB TMRW app, access the Wealth tab. Tap on ‘SGFinDex One View’ under ‘Other wealth services’.
Step 2 : Tap "Agree" to accept Terms & Conditions.
Step 3 : You will be required to perform your Singpass Login.
Step 4 : On this consent page, you will be able to see the list of items you will be sharing with banks you have previously provided consent to. Tap "I agree" to continue.
Step 5 : SGFinDex One View will connect the respective banks that you have linked, to pull your information.
Step 6 : You will see the organisations that we have retrieved the data from. Tap "OK" to proceed.
Step 7 : You can now view your consolidated financial holdings in SGFinDex One View.
Step 1 : Login to UOB TMRW app, access the Wealth tab. Tap on ‘SGFinDex One View’ under ‘Other wealth services’.
Step 2 : Tap on "Manage".
Step 3 : You will be required to login to SGFinDex via Singpass.
Step 4 : You will be shown a list of banks you have previously linked. To withdraw this consent, tap on "Disconnect".
Step 5 : To confirm, tap on "Yes, disconnect".
Step 6 : Your withdrawal is successful when you no longer see the selected organisation(s) on this page.
Rewards+
Step 1 : Tap on 'Rewards+' from the bottom navigation bar.
Step 2 : Select "Redeem UNI$".
Step 3 : Tap on 'All' to see all eligible merchants and deals.
Step 4 : Select your category.
Step 5 : Tap on preferred rewards to redeem.
Step 6 : Select preferred quantity.
Step 7 : Select your card to redeem from.
Step 8 : Select card to redeem UNI$.
Step 9 : Tap on ‘Confirm’ to proceed.
Step 10 : Successful redemption.
Step 1 : Tap on 'Rewards+' from the bottom navigation bar.
Step 2 : Scroll down to the "UOB Coupons" section.
Step 3 : Select the UOB Coupons of your choice.
Step 4 : You may use the "Sort by" function to filter the latest deals or merchant name for easier convenience.
Step 5 : Followed by "Filter by" function for Online and In-store and tap "Apply".
Step 6 : Tap on "Grab it now".
Step 7 : Save Coupon to your Rewards.
Step 8 : Find coupon in your Rewards for use. Don't forget to use them before they expire! Tap on "History" at the top right corner to view your past redeemed coupons.
Step 9 : Over here, it will show the overview of the UOB Coupons that you have redeemed over the last 3 months.
Step 10 : Select the month that you wish to view. Once you are done with the selection, it will show the redeemed coupons for the selected duration.
Step 1 : Log in to UOB TMRW and tap "Scan to pay".
Step 2 : Select QR code or upload from device.
Step 3 : Select your debiting account and enter the purchase amount.
Step 4 : In the confirmation screen, check all details and swipe right to confirm.
Step 5 : Your payment is completed.
Step 1 : Log in to UOB TMRW and tap "Rewards+".
Step 2 : Select any deals of your choice.
Step 3 : Review the details and tap on "Buy now" to proceed.
Step 4 : In the confirmation screen, check all details and swipe right to confirm.
Step 5 : Your purchase is completed.
We're here to help

Chat with us

Contact us

Locate us
Take charge with UOB TMRW, download now


We use cookies to improve and customise your browsing experience. You are deemed to have consented to our cookies policy if you continue browsing our site.